
I am so excited to share the project I made using the new Tags, Bags, Boxes and More 2 cartridge. I never had the first one, and when I saw that you could make a teacup with this one, well, I just had to have it! My dear hubby bought me the cart for Mother's Day, and I just used it last night. I'm really happy with how my project turned out.

Here's How I Made the Teacup
K&Co Watercolor Bouquet Designer Paper (must use 2-sided cardstock)
Cut the teacup at Fit to Page; it cut everything at 11-1/2"
(finished size is 3" H x 3-1/2" W for cup; w/saucer, 5" W)
Glued lace around the top of the teacup
Used a paper doily for the saucer; glued in place
Glued the cup to the saucer.
Tag punch and twine to hang sentiment.
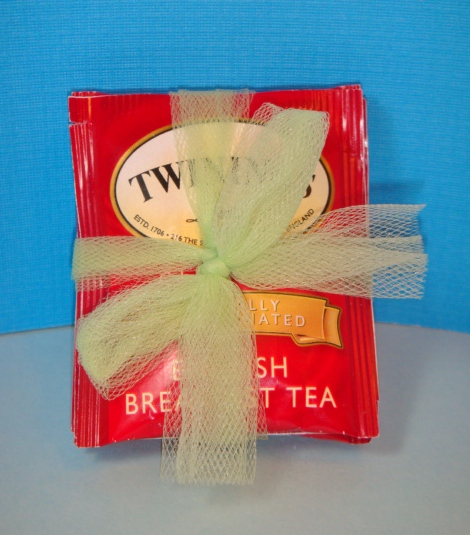
Tied some teabags together with tulle
Lined cup with tulle (all of sudden, I'm loving tulle, and isn't that a funny word to say?!)
Some more photos from the beginning.

Top of saucer.

Bottom of saucer, I added an extra circle here.


Yes, there has to be a seam somewhere; at least it's in the back.

I'd love to know if you've had any experience using this cartridge and what you think about it.
* * * * * * *
I learned a lot about this cartridge in one night. If you don't have it and are considering buying it, here's some things you should know.
Because everything on this cart can be made in 3-D, there's a lot of scoring to be done for the folds, including curved scores (like on the teacup). That's where the scoring tip comes in, and I believe it would be VERY helpful to have. I didn't have one, but I scored all the folds with my stylus and ruler.
I watched a few videos on YouTube to learn how to incorporate the scoring tip. First, you cut your desired image. When it's finished, do not remove your cutting mat, but rather push the "load" button to bring your mat back to the starting position. Remove the cutting blade housing and insert the scoring tip housing. Select the appropriate scoring by using the <shift> key, and then press "cut." If your mat has not been moved, then the scoring appears to match up exactly with the cut. And that, my friends, seems pretty amazing!
The "regular" cartridge handbook provides a recommended cutting size. Images should be cut at that size or larger.
Along with the regular handbook, the cartridge also comes with a booklet of Assembly Instructions. This shows you how to assemble your project and provides the approximate assembled size.
I'm entering my project into the following challenge:
Crafty Cardmakers: Anything but a Card, Tag or ATC.
Hope you've enjoyed my project for today. Thanks so much for stopping by. I appreciate all your comments! And all my crafty friends!
This is absolutely darling! LOVE the lace trim--what a clever detail! Thanks for joining us at CCM! :)
ReplyDeleteI, of course, love the tea cup!!! I can't wait to show it off tonight. Thanks for making it and the matching card for me and for making my birthday special! Can't wait to see all the goodies in the sticker packet!
ReplyDeleteOh, wow Pat! This is amazing. I do want this cart! It is already on my wish list. Can't wait to see what else you make with this cart.
ReplyDeleteStay Creative,
Georgiana
Carson's Creations
Did you know that you can take your blade and turn it upside down to use as a scoring tip? I've done that a long time ago...can't remember for what though! lol Your tea cup looks precious, you did a fab job on it!! waving hi from the hills of North Carolina :)
ReplyDeleteGreat project! I really want this cartridge now after seeing this.
ReplyDeleteKerry
mommakcrafts.blogspot.com
Too Funny!I have been working on my tea cup but have not had the chance to finish it...you beat me..LOL...I absolutely love it!!!
ReplyDeleteLovely! This is truly beautiful Pat! I don't have this cartridge, but may have to add it to my collection in the very near future!
ReplyDeleteThanks...I'm glad that I inspired you. Your tea cup turned out great. And no, I didn't use the scoring blade.
ReplyDeletehttp://iwycd.blogspot.com/
Super! Such a great tea cup and great tulle! Looks like a lot of work went into this!
ReplyDeleteThis came out so sweet. What a great gift. Or favor.
ReplyDeleteThis is so adorable...I really like how you used the lace and doily! Wonderful ideas. Kathie
ReplyDeleteWhat a lovely way to present a gift!! Love the colours you have used! Thanks for joining us at Crafty Cardmakers!! Cxx
ReplyDeleteThis is stunning......
ReplyDeleteNana
What an unusual project! Thank you for sharing it with us at Crafty Cardmakers.
ReplyDeleteJackie
What a great project and so different. The papers you've used are so pretty and I love the lace and doily they're perfect finishing touches. I really need a cup of tea now!
ReplyDeleteThanks for sharing with us at Crafty Cardmakers.
Feebsy
xx
WOW Pat the tea cup is Fantastic and it looks so real! I really do not need more enabling right now! lol
ReplyDeleteI have had to put my craft spending on hold because everyone keeps enabling me! hehe
Great job and thanks for the tips for using the cartridge(:
Elaine